
In previous post I listed material chips libraries and said that I went with BelooS/ChipsLayoutManager. It’s time to tell you why and how.
Warning! BelooS/ChipsLayoutManager is no longer maintained so I can’t recommend it anymore.
Why
As I noted before, the idea seems pretty great. Instead of custom views you use regular RecyclerView with its regular adapter, as you would do every time. They way to plug this library in is via LayoutManager of RecyclerView. It makes this library very unobtrusive - a few lines of code and everything just works. It replaces just small part of RecyclerView and so I predict that even if it’s abandoned, it will hold up well for a loooong time.
There is also one thing that was lacking in many other options - ability to customize chip’s text size. It seems simple but in practice - of course - it isn’t. In my case default text was definitely too small. I preferred to have chips layout ready but it turns out it’s really simple anyway so maybe doing custom layout was better idea after all. That way I have full control over chips. And again, because of how this library is implemented, I can change chip layout freely without worrying it would break something.
So in fact ChipsLayoutManager has nothing to do with chips, the author even says it (indirectly):
This layout manager could represent Google Chips material design pattern
Turns out ‘ChipsLayoutManager’ name is a bit misleading, but maybe that’s a good thing - otherwise I probably wouldn’t find it. In reality it’s just LayoutManager for RecyclerView which makes possible to have a few items in one row and takes care of all positioning.
Granted, sample app and all images and gifs in ‘Readme’ use material chips. So it was designed with chips in mind and you can just implement chips in our own app based on sample app.
How
Usage is extremely simple, you can check sample code from project’s Readme or check easy version that I use in my project:
val chipsLayoutManager = ChipsLayoutManager.newBuilder(context)
      //set vertical gravity for all items in a row. Default = Gravity.CENTER_VERTICAL
      .setChildGravity(Gravity.NO_GRAVITY)
      .setScrollingEnabled(true)
      //set gravity resolver where you can determine gravity for item in position.
      //This method have priority over previous one
      .setGravityResolver { Gravity.NO_GRAVITY }
      .setOrientation(ChipsLayoutManager.HORIZONTAL)
      //row strategy for views in completed row, could be
      //STRATEGY_DEFAULT, STRATEGY_FILL_VIEW, STRATEGY_FILL_SPACE or STRATEGY_CENTER
      .setRowStrategy(ChipsLayoutManager.STRATEGY_DEFAULT)
      .build()
recyclerView.layoutManager = chipsLayoutManager
Basic usage is literally 8 lines of code. Ok, maybe there is more. From docs:
You may need an RecyclerView.ItemDecoration to work with ChipsLayoutManager for fast setup as showed in sample. It contained in same package and named SpacingItemDecoration.
And you really need it, or there will be no spacing between chips. So you need to modify your recyclerView:
recyclerView.addItemDecoration(
SpacingItemDecoration(
resources.getDimensionPixelOffset(R.dimen.chips_horizontal_margin),
resources.getDimensionPixelOffset(R.dimen.chips_vertical_margin)
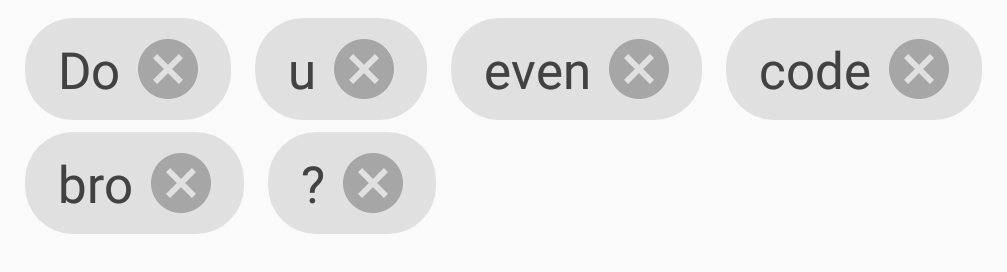
))That’s really all. So make it 12 lines. Of course you still need adapter as you normally would do with RecyclerView and custom view for chips item. As I’ve already said, you can just use layout from sample app. I simplified it and it comes down to:
<RelativeLayout
        xmlns:android="http://schemas.android.com/apk/res/android"
        xmlns:tools="http://schemas.android.com/tools"
        xmlns:app="http://schemas.android.com/apk/res-auto"
        android:layout_width="wrap_content"
        android:layout_height="wrap_content"
        android:layout_gravity="top"
        android:layout_margin="5dp"
        android:padding="5dp"
        android:background="@drawable/rounded">
        <TextView
                android:id="@+id/chipTextView"
                android:layout_width="wrap_content"
                android:layout_height="wrap_content"
                android:layout_marginStart="6dp"
                tools:text="ChipText"
                android:textColor="@color/chipTextColor"
                android:textSize="17sp"
                android:layout_centerVertical="true"/>
        <ImageButton
                android:id="@+id/removeKeywordButton"
                android:layout_width="wrap_content"
                android:layout_height="wrap_content"
                android:layout_toEndOf="@id/chipTextView"
                android:layout_marginEnd="4dp"
                android:layout_marginStart="4dp"
                app:srcCompat="@drawable/vector_cancel_24dp"
                android:background="@null"
                android:layout_centerVertical="true"/>
</RelativeLayout>
And rounded drawable:
<shape xmlns:android="http://schemas.android.com/apk/res/android">
    <solid android:color="#E0E0E0"/>
    <corners android:radius="16dp"/>
</shape>
Alternatively, if you are feeling very lazy, you can just use library for this: robertlevonyan/materialChipView. But for simple use, there is really no need for another dependency.
Final part is adapter, nothing unusual but for the sake of completness:
class ChipsAdapter : RecyclerView.Adapter<ChipsAdapter.ChipViewHolder>(){

    val chipsContents: MutableList<String> = mutableListOf()

    inner class ChipViewHolder(itemView: View) : RecyclerView.ViewHolder(itemView) {
        fun bind(chipContent: String) {
            with(itemView) {
                chipTextView.text = chipContent
                removeChipButton.setOnClickListener {
                    val index = chipsContents.indexOf(chipContent)
                    chipsContents.remove(chipContent)
                    notifyItemRemoved(index)
                }
            }
        }
    }

    override fun onCreateViewHolder(parent: ViewGroup, viewType: Int): ChipViewHolder {
        val v = LayoutInflater.from(parent.context).inflate(R.layout.chip_item, parent, false)
        return ChipViewHolder(v)
    }

    override fun getItemCount() = chipsContents.size

    override fun onBindViewHolder(holder: ChipViewHolder, position: Int) = holder.bind(chipsContents[position])
}
BTW just imagine how long this code would be without Kotlin <3
That’s all folks. ChipsLayoutManager is really easy to use and gives you flexibility, what’s not to like?